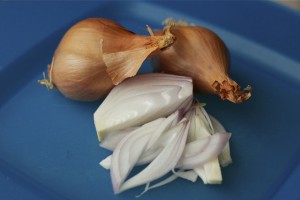
Shallots: my new little darlings in the kitchen.
It’s the end of February and Spring garden fever is setting in.
I’m choosing to ignore those pesky patches of snow on the ground.
Early Spring is actually a great time to plant some of my favorite veggies: sugar snap peas, lettuce, cauliflower, broccoli and onions.
This year though, the star of the early show will be shallots.
Shallots are my new little darlings in the kitchen. That sweet onion and garlic flavor is putting a new twist on my hashbrowns, stir-fry and roasted vegetables, pizzas, pastas and more.
In fact, shallots do seem to be that perfect union of garlic and onion. They slice up and have the texture of an onion yet come in cloves like garlic.
In my garden, I plant garlic in the Fall and onions in the early Spring. I will likely choose to plant shallots during both seasons for a continuous supply.
Shallots can be planted as seeds or bulbs. I’ve always had better luck with bulbs, so that’s my plan.
Both Al’s Garden Center and Farmington Gardens carry the bulbs.
So as soon as this cold spell retreats and the soil isn’t frozen, I’ll be out putting bulbs in my raised garden beds.
Shallots grow best in loose, well-drained soil in full sun. Plant the bulbs about an inch or two deep with the tips slightly poking out from the soil’s surface. And, space them 6 to 8 inches apart.
The rest is just like onions.
Shallots are ready to harvest when the leaves begin to yellow.
Lift them out, shake off the dirt and store in a dark, warm and dry place for a week to cure (I use the attic).
Then you can move them to a mesh bag and store in a cool, dry place for months (I use a loosely closed box in my garage).
I found more tips for caring and storing shallots at gardeningknowhow.com.
Leave a Reply